Why you need to know what crossing midline is for your child’s development! Plus, 6 therapeutic crossing midline activities you can do at home easily.
Have you heard of crossing midline before? It’s one of those occupational therapy/sensory integration things that us OT’s look for when we’re working with children. We look for it because it’s a skill that’s easy to miss. It’s subtle. But, if a child’s not crossing midline naturally in their play, it can have an affect on how they learn, develop their fine motor skills, and even on their vision!
What is Crossing Midline?
Crossing midline might sound strange, but it’s actually really simple once you know what you’re looking for. Imagine that there’s an imaginary line directly in the middle of the body that separates the left side from the right side.
During development, babies first reach out with their hand only to the same side of the body. Meaning they won’t reach across their body for a toy, they’d simply reach with their other hand. In part, this is because they aren’t “left-handed” or “right-handed” yet, but it has more to do with how the brain the works and when we cross over that imaginary line with an arm or leg, it requires both sides of our brain to work.
Why Should You Even Care If Your Child is Crossing Midline Easily?
As babies get more practice with reaching and grabbing onto toys and the keys from your purse, they begin to bring it to the midline of their body, not crossing over yet though. Then they move the toys from one hand to the next. This is the precursor to using both hands to play, otherwise known as bilateral coordination. (Crossing midline is one aspect of it, head to Bilateral Coordination Activities to learn more).
From there, toddlers and older children will then develop the ability to actually reach across their body when they’re coloring, cutting, throwing a ball, or playing kickball.
And, that’s a good thing because not only do we need to cross midline to complete those activities, we also need the practice of both sides of our brain working together for reading and other higher learning!
Does Your Kid Need to Work on Crossing Midline?
Crossing midline is an important developmental skill for every child, so at a minimum, it’s great to be aware of and encourage. But, most kids don’t need to focus on it in particular. If you notice that your child is behind in fine/gross motor skills, visual perceptual skills (think puzzles, mazes, etc.), learning/development, or has sensory needs, then you’ll want to set up some of the activities below and watch how easily they cross the midline of their body.
However, we don’t expect kids to cross midline easily until around 3 – 4 years old. So if your child is under 4 don’t expect them to be perfect at it, but you should see that they’re capable.
How to Help Your Child With Crossing Midline
You might be thinking that you’ll just ask your child to reach across their body a few times and they’ll be good, but it doesn’t quite seem to work that way. Instead, kids experience all the benefits of crossing midline much more deeply when they do it on their own.
Ideally, we want crossing midline to happen naturally. But, that doesn’t mean that you can’t create the right scenario so that happens. In fact, it’s best to set these activities up, never telling your child what your intention really is, because we don’t want them focusing on completing the skill.
There are two ways I like to make that happen:
1. Strategically setting up activities: Whether you offer a fine motor activity like puzzles or your child has initiated the activity on their own, you can conveniently place materials in a way that forces them to cross midline. For example, as you can see in the picture below, my son is putting stickers on a piece of paper.
He’s right handed, so I put some “X’s” on the left side of the paper for him to cover with stickers. I also could have have put the stickers on the left side of the paper so he had to reach across to get the stickers too.
Many kids will naturally avoid crossing midline, but it doesn’t mean they can’t do it. It’s just easier not to. So you may see your child move the stickers or switch to their non dominant hand just to avoid the activity. If this happens a lot, I’ll give them a little coin or treasure to hold in their other hand so they aren’t tempted!
2. Gross motor activities that require both hands and feet: Any unstructured game of toss, kicking a ball, or throwing at a target can get your child to cross midline without thinking about it! Most kids are motivated to play these games one on one with you. I love this style of activity because you don’t have to focus on crossing midline, it will happen on it’s own and that will have the greatest results for your child!
Affiliate links used below. See our full disclosure.
Fun Crossing Midline Activities to Play with Your Child
Let’s talk about a few specific activities that you can set up quickly for your child so they can work on those crossing midline skills! With all of the activities below, you want your child to use their preferred hand, and discourage switching hands!
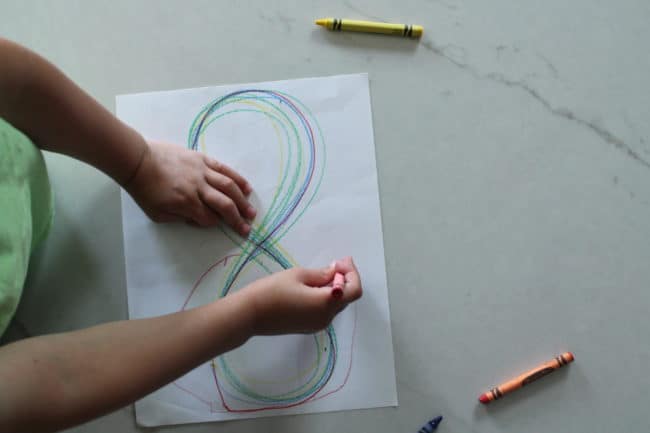
1. Figure 8 Race Track: This is a classic occupational therapy activity, but it’s so easy to replicate at home. It forces your child to cross midline and also strengthens visual perceptual skills. Basically, you’re going to draw a large sideways 8 or infinity symbol on a horizontal piece of paper. Then you can ask your child to trace it, making sure they make the figure 8 pattern as they draw.

My son tried to stop in the middle and go the opposite way! It’s important that they follow the same direction making an infinity loop that has no end.
You can also have your child trace it with a car instead of drawing with a crayon. It’s a prefect race track!
For 2 and 3 year olds: Don’t expect them to be very good at this activity. Put your hand on top of theirs at first so they get the feel for the motion.
For 6 years and older: To make the activity more challenging, have them draw it themselves after you show them how. Also, drawing it on the wall so that it’s vertical and larger can help strengthen fine motor skills as well. Think about using a large blackboard or roll of paper!
2. The Moving Target: Give your child a spot to stand on, if you have a carpet square or baseball base that would work great. You could also use tape to outline a small box on the floor. It’s okay if they move their feet a little, but we don’t want them to be able to shuffle from side to side. Then set up a target for them to shoot at with a Nerf or water gun.
This could be a blackboard, paper, or white board with a target drawn on it. Stand directly in front of your child at first, as they have some success, move to the sides and experiment with placing the target higher or lower (you can simply hold the target if you don’t mind getting a little wet!). Moving the target will naturally encourage them to cross midline!
Make it harder: Move the target farther away and give multiple targets for different point values!
If you have a therapy swing: An incredible way to use this activity is while your child sits in the swing that has just one hook. It’s important that their feet can’t touch because this forces them to shift their weight and cross midline. A cocoon swing or net swing work perfect for this. A typical playground swing doesn’t work as well because it hangs from two different points and usually isn’t high enough to keep their feet off the ground!
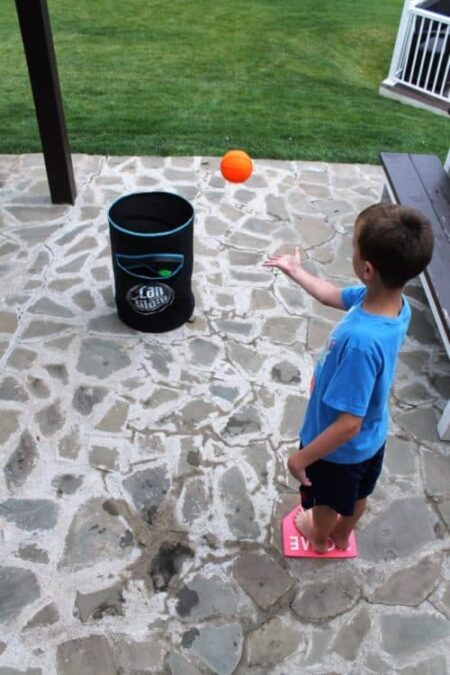
3. Toss It: In a similar way, you can set up a game of toss with anything from marshmallows to bean bags. Use baskets, buckets, or cups as your targets. Then, set up a bunch and see if they can make. You’ll want to give them a spot to stand in again, otherwise they may side step to avoid crossing midline.

For 2-3 year olds: Use laundry baskets and large buckets along with large balls that they have to use two hands to hold, at least at first. The smaller the ball and bin that they’re throwing it into, the harder it is!
For 7 years and up: Try throwing small bouncy balls or tennis balls with a smaller bucket for them to score a point!
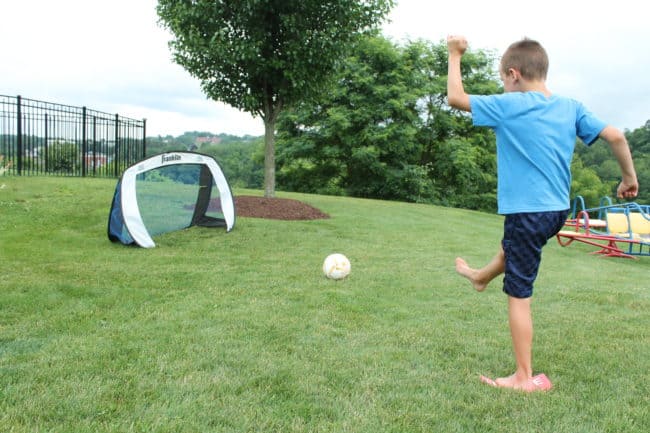
4. Kick It In the Goal: Use a pop up soccer net (like this one) or turn a laundry basket on it’s side to use as a goal. Then, repeat their spot to stand on and move the target around to see if they can kick it in. It really doesn’t matter how far away they stand, the point is for them to kick across their body. So you can place the ball in front of them and if you need to, tell them which leg to kick with.
Again, you’ll want to make sure you’re placing the goal opposite of their dominant side.

5. Paint the Whole Paper: Get a large piece of paper and either put it on an easel or tape it to the wall if you don’t mind some clean up. Give your child a spot to stand in again. Then tell them they can use whatever colors they want and paint (or color) whatever they want, but no white can be left on the paper.
This is basically impossible to complete without crossing midline, as long as your child keeps using their dominant hand. If your child tends to switch hands often, decide together ahead of time which hand they’ll use!
6. Clean: Dusting, vacuuming, cleaning windows, wiping off counters, and more can all require a child to cross midline. Make sure you watch how your child is completing these activities so they aren’t switching hands or side stepping to avoid it. With their focus on cleaning, it’s likely that they won’t think about it and start to cross over. And, you get your house clean, bonus!
For 2 – 4 year olds: Focus on wiping cabinets, walls, or the the front of the fridge and other appliances. You can even sprinkle some flour in the corners to make sure they’re reaching and crossing midline.
Doing any of these activities a couple of times a week can have a big impact on your child’s ability to cross midline and now you know that’s going to help them with reading and writing!
Have a question about crossing midline? Ask us in the comments below. Or, I’d love to hear which of these activities you’re going to try first with your child!
Need More Help With Sensory Needs?
Difficulty crossing midline is just one of the many ways sensory processing needs can affect a child. They may be wild, aggressive, or incredibly sensitive. As a parent, it can feel overwhelming and confusing. Not to mention all of the misguided advice from everyone that doesn’t understand sensory. That’s why, I created the 3 Expert Secrets to Calm and Focus Your Child with Sensory Activities free workshop!
*Click here to grab a seat*
(We’ll send a free workbook to your inbox)
More on Sensory
Ridiculously Do-Able Sensory Integration Activities to Use at Home
What Parents Need to Know About Sensory Dysregulation
How to Help a Child with Sensory Sensitivities
60 Printable Sensory Diet Cards for Kids to Thrive
Citations and References for this article:
Sensory Integration: Theory and Practice. Second Edition Anita C. Bundy, Shelly J. Lane, Elizabeth A. Murray (F.A. Davis Company 2002)
Alisha Grogan is a licensed occupational therapist and founder of Your Kid’s Table. She has over 14 years experience with expertise in sensory processing and feeding development in babies, toddlers, and children. Alisha also has 3 boys of her own at home. Learn more about her here.

Do you have tips for delayed potty training? She is 6 and a half and still struggles. Some days are only one accident, other days there are 4 accidents! She uses both hands, but is gradually using her right hand as dominant. She loves to read and can read very well for that age. She does have vision issues and wears glasses. She struggles with writing, says it is hard. Her main issue is the potty training.
Hi Robin,
We have a potty training guide that is based on sensory issues that many kids have. Look that over and see if it’s helpful. We do have an extended product in our shop on this topic as well, but start with this guide.
Best,
Laura
Your Kid’s Table team member
Any guide or tips on which hand to use if they trade off? When should we look to more consistently using a dominant hand? Kiddo who has ASD 🙂
Children start to show emerging dominance of a hand between the ages of 2-4. MOST kids will have a dominant hand by the ages of 4-6. I know this is a range, so if they have not showed a preferred hand yet, I would do activities with both 🙂
What about tennis? Is that a good crossing the midline activity?
having received many lessons in tennis, even though there are times you shuffle sideways and turn the body sideways, pretty much all the strokes, ( backhand, follow through with forehand and ending stage of serving, even feet with the strokes) will most definitely cross the midline. Also like all the other components, visual tracking, timing with a motor response, and the different foot work involved . Great sport, Don’t have to be great to have Big Fun
Hey Lauren, YES!!! Great Thought! Tennis is great, especially when targeting to hit the ball in all areas of the court. For younger kids, you can use paper plate paddles and a balloon!
Have Fun!