|
|
| Home-made baby food: beets in the OXO baby food storage tray |

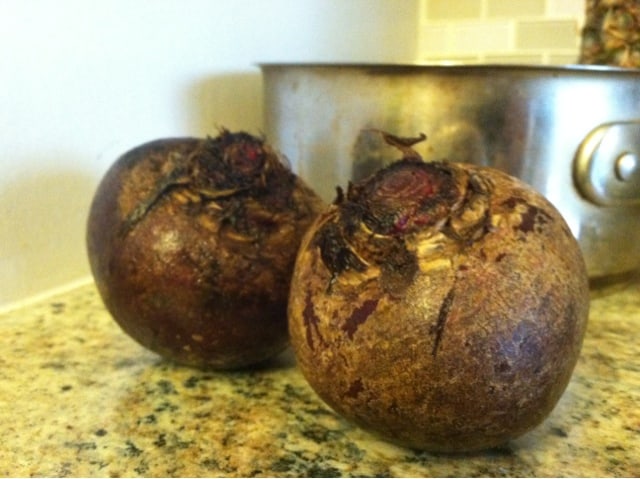 |
| Fresh Beets- a great baby food, and one you will be hard pressed to find in a jar. |
1. Make it as You Go– With a little planning your baby can probably eat some or all of what you are eating anyways. If you aren’t that worried about food allergies and feel comfortable introducing foods quickly then this could be a good strategy. Plus, it requires a lot less prep and planning ahead of time. However, if you aren’t going to freeze anything in advance you should probably get a “baby food maker” or compact, efficient food processor, such as the Magic Bullet
. A “baby food maker
” is essentially a smaller version of a food processor and/or steamer. Although, I have never used one, I imagine for the short time you’ll need it, they are beneficial and may be worthwhile, especially for this method. You’re going to want to keep this handy, probably leaving it out on your counter, it will get a lot of use for about 4-6 months.
 |
| Diced beets in water. Beware, cut beets will turn your hands red while you are cutting and maybe your child’s urine and stool, but it is harmless. |
- Clean and peel fruit or vegetables. If your child is in the later stages of baby food, you could leave the skin on your apple or pear.
- Grate or cut into small uniform pieces. The smaller the better because it takes less time to cook and thus keeps more nutrients in tact.
- Place in a pot of boiling water with just enough water to cover or into your steamer.
- Cook until you can easily push a fork through food.
- Place cooked food in a blender, magic bullet, food processor, or baby food processor. I have always used a blender and it works great.
- Puree until smooth or you reach your desired consistency. You may need to add more water if it is too thick or isn’t blending up well enough. If you are making potatoes make sure not to over mix or they will get too sticky.
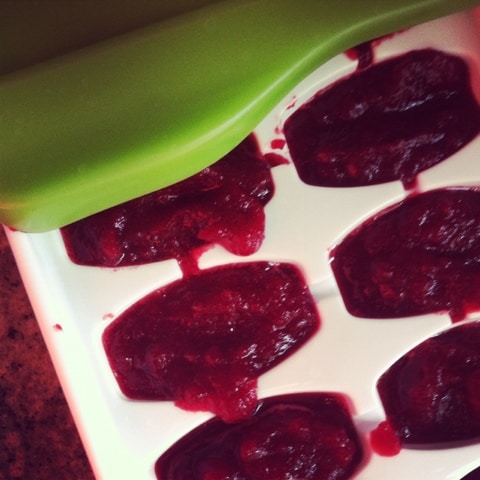
- Place into small individual portioned storage containers or an ice cube tray and cover with aluminum foil. If using the latter, once frozen, remove individual cubes and store in a freezer bag or storage container for up to 3 months. Write the date on the bag to help you remember!
- Pull cubes out 1-2 hours in advance of eating time to heat in hot water or place in microwave for 15-20 second increments to defrost.
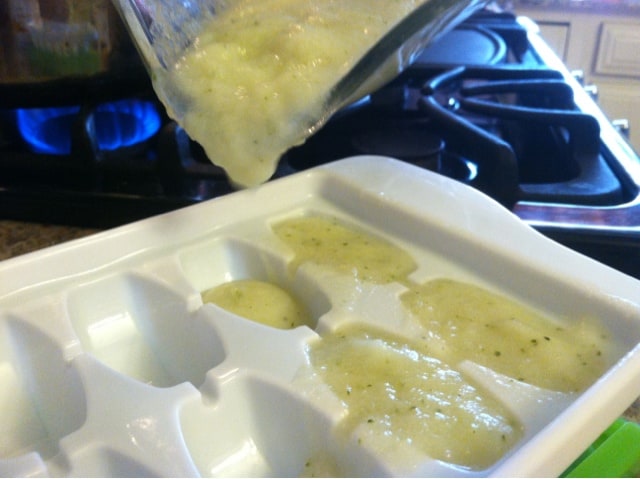 |
| Home-made baby food: Cauliflower (there are some specs of broccoli in there because I boiled both together as a timesaver.) |
I would continue this pattern of making large batches every other night or so for a couple of weeks building up my supply and variety. I started Isaac on solids at 6 months, so most of his supply has just about dwindled now that he is 9 months old, which is perfect because I am giving him many table foods now and pureeing more of what we are eating since he is older and able to manage more texture. This is what works for me. It may be easier for you to have a cooking day and make it all at once.
I should mention that I buy some store-bought food for the diaper bag just in case we get stuck out somewhere. Also, I use a food mill to mash up soft no-cook foods like banana and avocado. I describe this further under option 3.
- Tips:
- Add a drizzle of olive oil and a dash of spices such as parsley, cinnamon, oregano, dill, or corriandor (to only name a few) once your baby has been exposed to the food in its purest form.
- Cook beans, lentils, chicken, and beef in a steamer or a little bit of broth then puree. Be careful not to overcook or it will become very dry. These proteins will also freeze well.
- Run peas through a strainer or baby food mill because there will still be hard pieces of the shell in the mix that the baby could choke on.
- Peaches, plums, peppers, and tomatoes can be boiled whole or in large sections without removing the skin, because doing so is extremely tedious. Once they are soft, pull out, and place in ice water for a few minutes. When you pull them out the skin will come off easily. If peaches and plums are very ripe you may be able to pull the skin off easily and grind up without cooking, especially if your baby is in the later stages of baby food and it doesn’t need to be very thin and smooth.
- banana (the riper the better if you are just starting out)*
- avocado*
- cooked veggies from soups, such as: potato, carrot, celery
- ripe berries, pears, peaches, and plums
- baked sweet potatoes and regular potatoes
 |
|
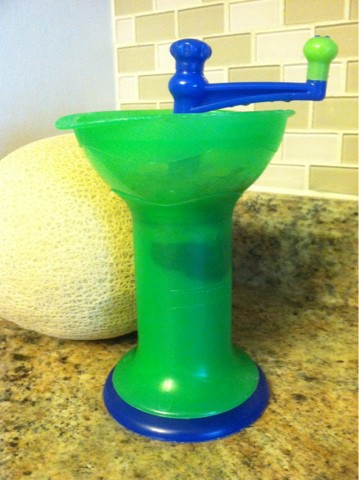
| Food Mill | |
 |
| Mashed banana after cranked through food mill. |
I do have a Munchkin Baby Food Grinder (aka: food mill), as seen in the picture above, I spent around 10$ and it has been well worth it. For those of you that are unfamiliar with this tool, it has two pieces that separate, which creates a chamber for the food to go into. When you place these two pieces together, turn the crank and your food will get pureed in a few seconds. Hard or tough pieces won’t fit through the holes, allowing the texture to be relatively smooth. Of course, you can toss these foods into a food processor of some type, as well, but the food mill leaves less clean up and set up!
There are no rules when it comes to mixing baby foods together. Experiment with different combinations. Here are a few popular combos to get you started:
- banana and avocado
- sweet potato and apple (try a dash of cinnamon or nutmeg)
- green beans and pear
- broccoli, carrot, and cauliflower (try a dash of parsley or dill)
- beets, apple, and pear
I love the idea of blending up a small portion of whatever meal I cooked to introduce baby to new flavors. But what about salt content? (I make a lot of stir fry, so the foods are usually cooked with soy sauce, oyster sauce… fermented black beans, etc.) Or what about spiciness? Is it safe for me to give a 6 month old that kind of stuff? I’ve actually been worrying a lot about how to safely introduce the stronger flavored stuff that my husband and I usually eat.
Ask your pediatrician recommendations for what they’d suggest in regards to salt intake. However, you can pull some of the food out prior to placing the soy sauce on and only add small amounts. Plus looking at if you had more salt for lunch, then having less for dinner. As for spices they can have those, within reason. I’d go ahead and give it a try and remember that it will take multiple tries before they adjust and know if they like the flavor!
Best,
Desiree
I appreciate your information. My baby boy gagged a lot. I held back serving him lumpy foods. Once he turned 11 months I started to get really worried. If found your website and it has been really helpful. He’s eating soft foods now and I am so encouraged. We are on our way 🙂
I can’t tell you how my much heart loves these comments. I’m so happy to hear that!! Great job Angela!
My 8month old grandson, also seems to gag alot it’s very worrying. Thanks for the info, I will make sure his food is thicker to begin with) which we do try too anyway and still gags) even toast in soldiers – he will tear of almost half if not more, then start coughing/choking.
Thank you again and will definitely take tips from you and also the comments that have been left
Hey Mandy!
Thanks for reaching out, we understand how hard of a transition this can be! You can start to utilize a toothbrush brushing his teeth and/or gums as this can help to desensitize the gag as well. We do have a free workshop full of great information for this age and transitioning to table foods as well. You can save your seat here
Best,
Desiree
I have been trying to find information on how to transition to table/finger foods. This was the most helpful post I’ve found. Thank you for the info and photos! I’m a nervous mom and have been breaking up the puffs for my 9 month old – she’s got the chewing action down now, and I’ve already been giving her thicker homemade foods…but it’s so nerve wracking!
I found the Vital Baby food pots have been amazing, from freezer or fridge to microwave. Cheaper than other brands but way durable. I got the 1, 3 and 7 ounce pots.
Oh, and my little one has had beets for 2 months now – loves them. Bok choy, garbanzo beans, black beans & rice, quinoa and kohlrabi too. Made carrots steamed with ginger, she loves them.
Thanks for all of the great tips and comments here on the different posts. I’m glad it has all been helpful! Remember to be brave, pushing yourself a little out of your comfort zone when moving to table foods.
I am loving your blog. I have a 8 mo old and have been intimidated of this process, but now I’m going to give it a shot. Thanks for posting with such thorough details.
While I was just about to sleep, I spent more than an hour just reading your writing. From blw to transmission, from difficulties to schedules 🙂 and I just find the courage to ask your advice/opinion. My daughter is just turned to 8 months today. And our food journey was a bit bumpy. First we tried with pureed foods (carrot, apple, pear etc) she seemed to gag a lot and throw the food out of her mouth. After a while she just closed her mouth and wanted to get the spoon and play. Then our midwife suggested blw so we did try. But it was also more about playing. So at the end, she sits with us at the dinner table, and playing with a carrot or something. And still throws the pieces out from her mouth that I gave like a small avacado for instance. So my question is, would it be strange to start over again with pureed food now? Or should we just try more with finger food?
Thank you so much for all the information
Hey Irma,
We understand where you are coming from and it can be hard. It would not be strange to go back to pureeds as this does happen! If she still is gagging a lot I’d check out our free workshop on transitioning to table foods. You will learn which foods to start with and how to help the gagging! You can save your seat HERE
Best,
Desiree
I would have never thought of beets!
Lots of great tips and suggestions, thank you! Although the actual process of making the baby food may be easy, it can be daunting to try to figure out what is ok and works best and exactly how to do it. Thanks for telling us how!